Week 1
About Modern Media and CGI Techniques used.
The Mandalorian
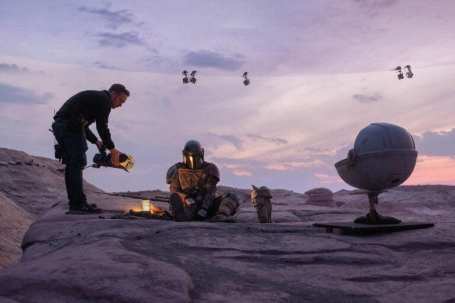
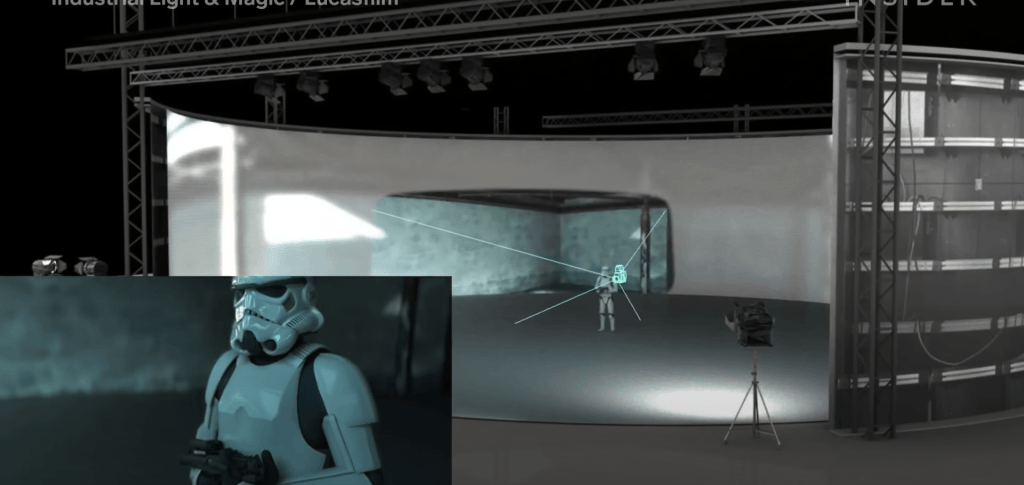
- Using LED Wall technology instead of green screen that create real time environment for actors. with help of unreal engine
- They use motion capture to track actors movements.
Every movie was using CGI to create real environment, the creators of “The Mandalorian” choose different route to make their film. They build a cylindrical wall made with digital screens that create desired environment around the actors. In the first season, they built a curved set of connected screens that was 20ft tall and 180 feet in circumference. It was too large to fit two buses in it lengthwise. They have extra 90 degrees in to fit in the empty space left and also there was an LED video ceiling that used to fit atop to provide the perfect environment need to shoot the scenes. Major issue of lighting is solved by the physical nature of cylindrical screens. There were 1,326 individual LED screens that appear seamless and connected and contain a 2.84 mm pixel pitch. This creates remarkably clear picture and gives plenty of room for camera to move around. The size and beauty of cylindrical wall of LED was good, but it needed generated pictures while filming scenes. The result look like a two-dimensional wall. So, to overcome this the engineers at ILM paired with Epic Games, along with their “Unreal Engine,” to create adjustable image that appears 3-dimensional to get a perfect scene. Unreal Engine was also used to track the camera movement using infrared camera movement that was staged on top of LED screens. By creating the volume filmmakers solve the biggest problem of lighting. Need of additional set design or object had been reduced as its now produced on screens. Now, Director’s requested can be implemented for Background and Special effects in the scenes from small changes like sparks flying off machinery to fully change the background is possible. To prevent use of more CGI a team of photographers can go to real time location and can scanned it. Which can be edited on the director request, saving countless money. One of the director said they save 50% of there time using screens compared to green screens. Its great many other movies like “Thor love and thunder”, “Ant-man and the Wasp: Quantumania” and more. Led screens can really help actors to give a perfect emotion if they can see what is happening.
Week 2
Learning about
- Environmental Design
- Architectural Styles
Mood board for my chosen environment
Oggy and Cockroaches

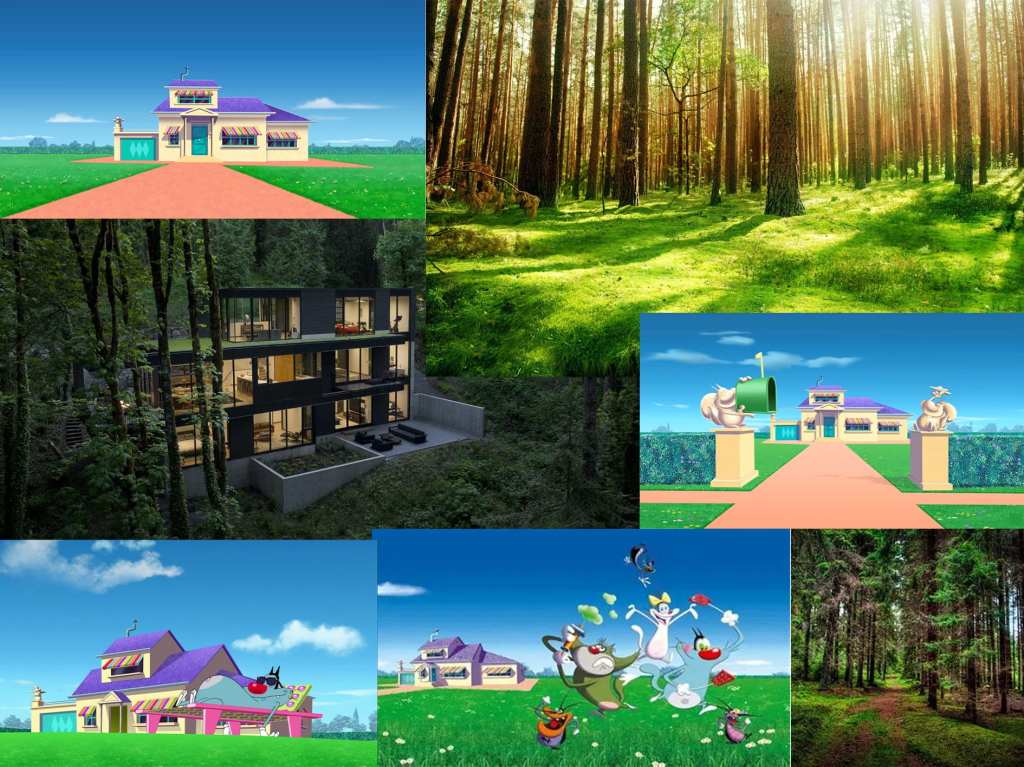
I have seen environment of a student of “Courage The Cowardly Dog” so I get an idea of doing one of my favourite cartoon “Oggy and Cockroaches” with Forest. It will be “Oggy and Cockroaches X Forest“.
I have gather enough reference and maybe will get more when I start working on it more.
I plan to give a real look to it, with house, oggy, Cockroaches, trees, rock, and more. I plan to Work on Textures, statues, lawn, chair.
Week 3
Using Unreal engine
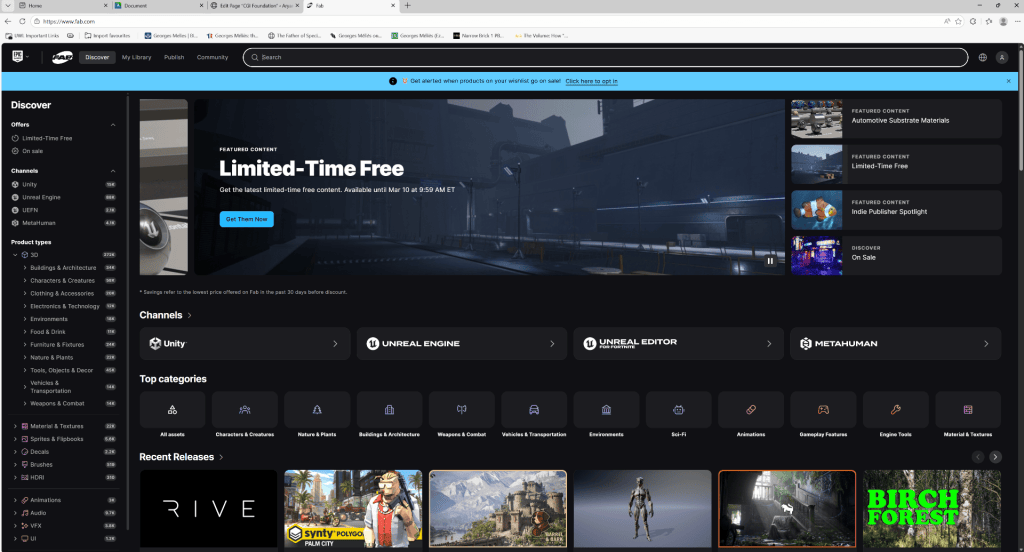
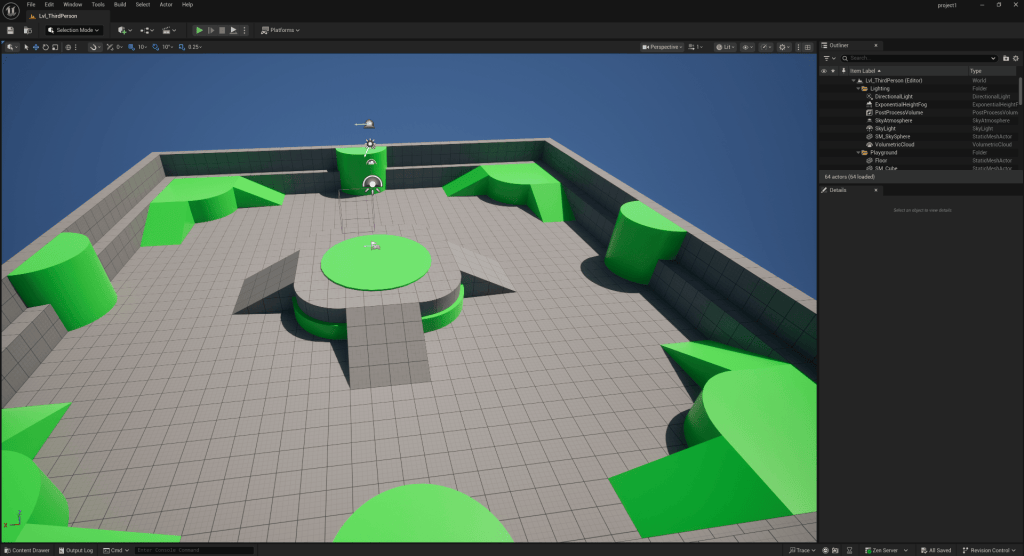
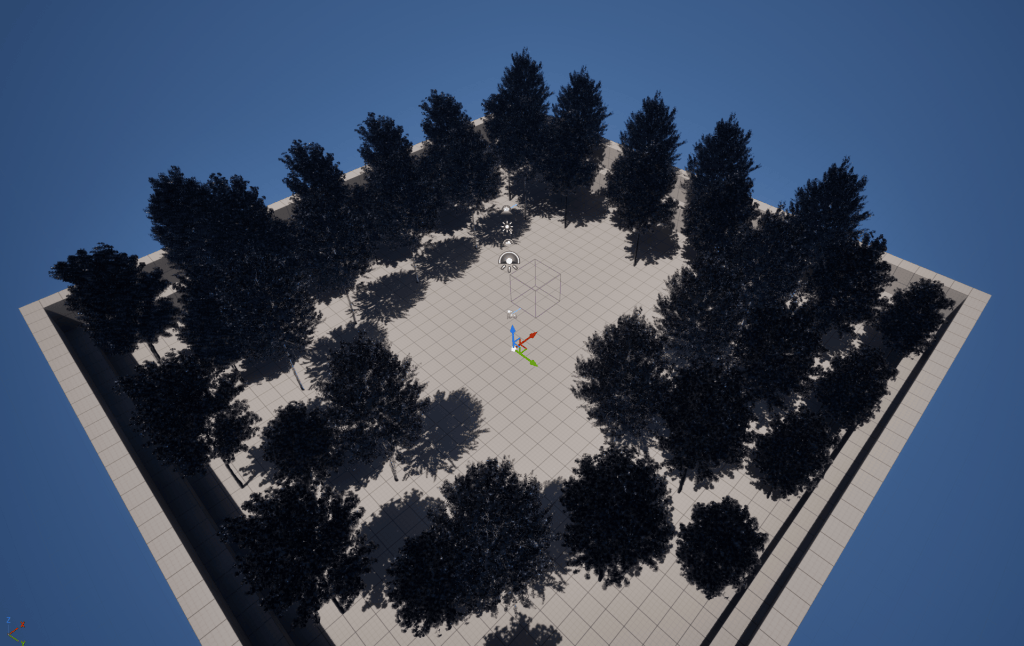
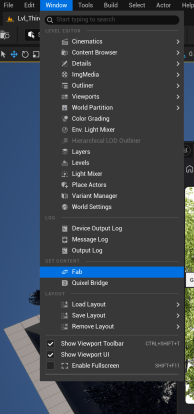
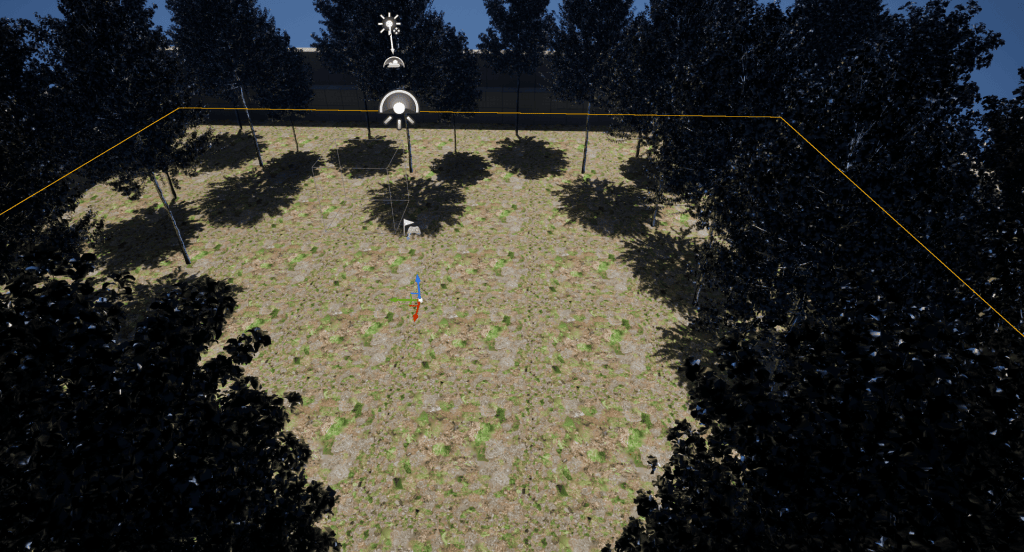
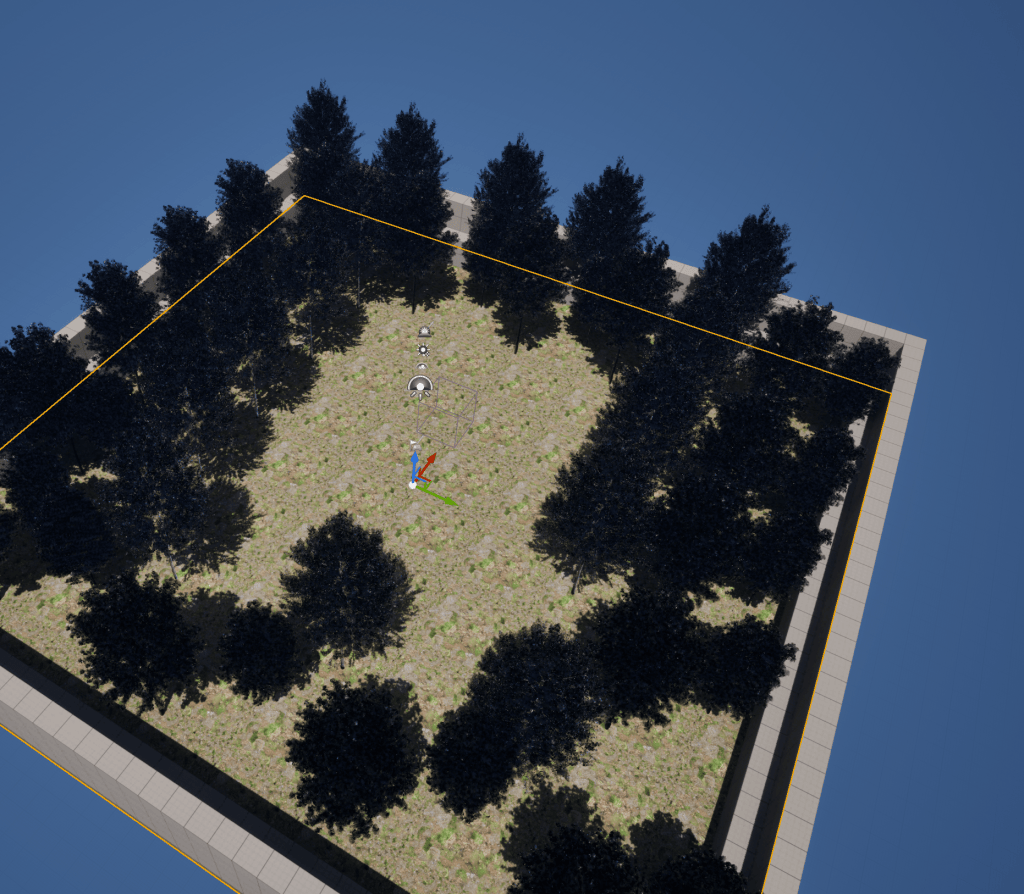
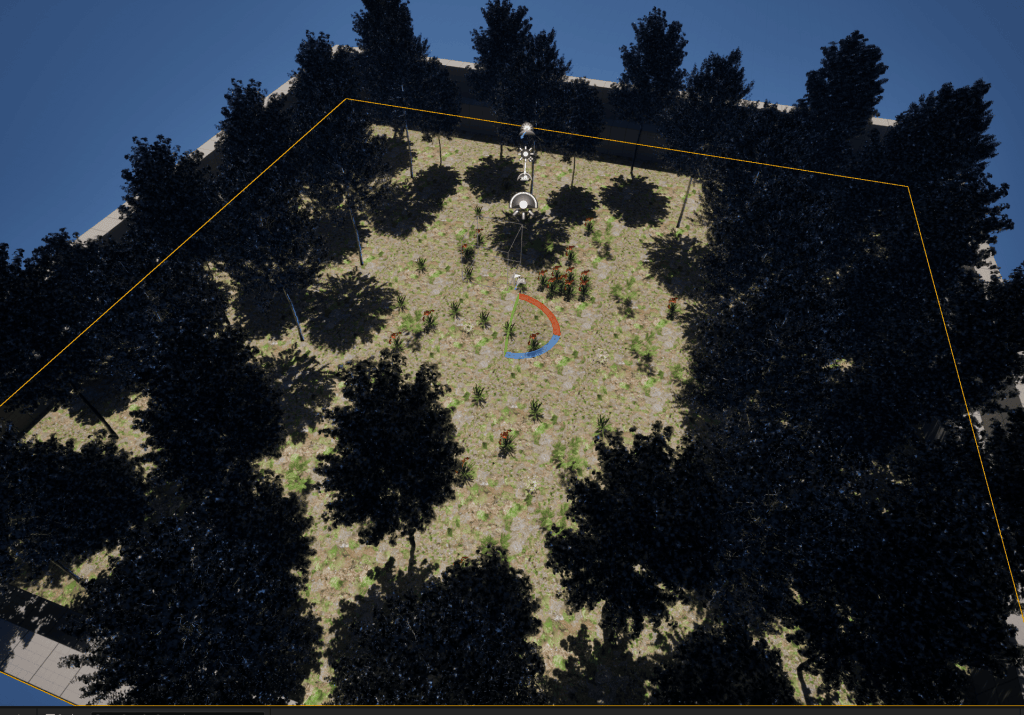
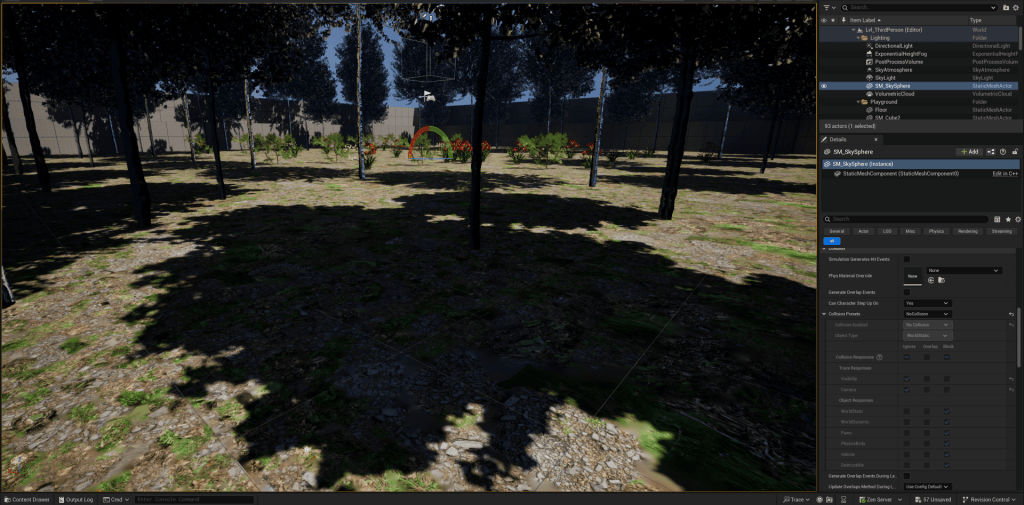
In this lesson, I get to know about Unreal, I used fab market to get model, textures and map for unreal with that I tried to create a forest scene with flower, grass, rocks and trees.
Week 4
Blueprints
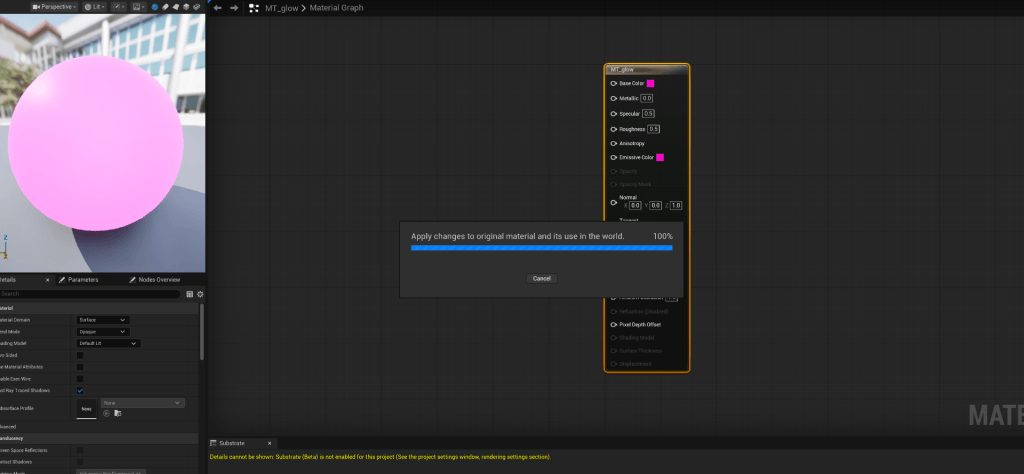
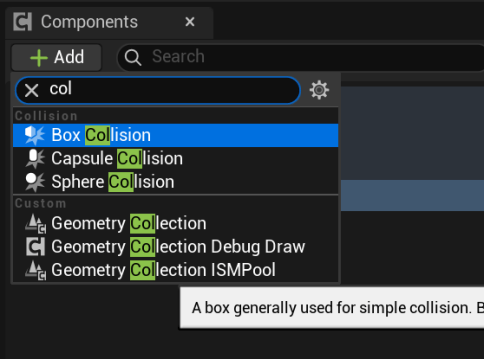
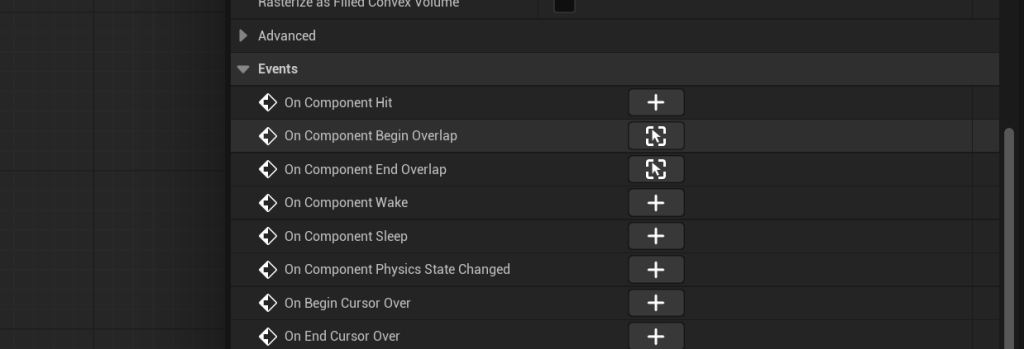
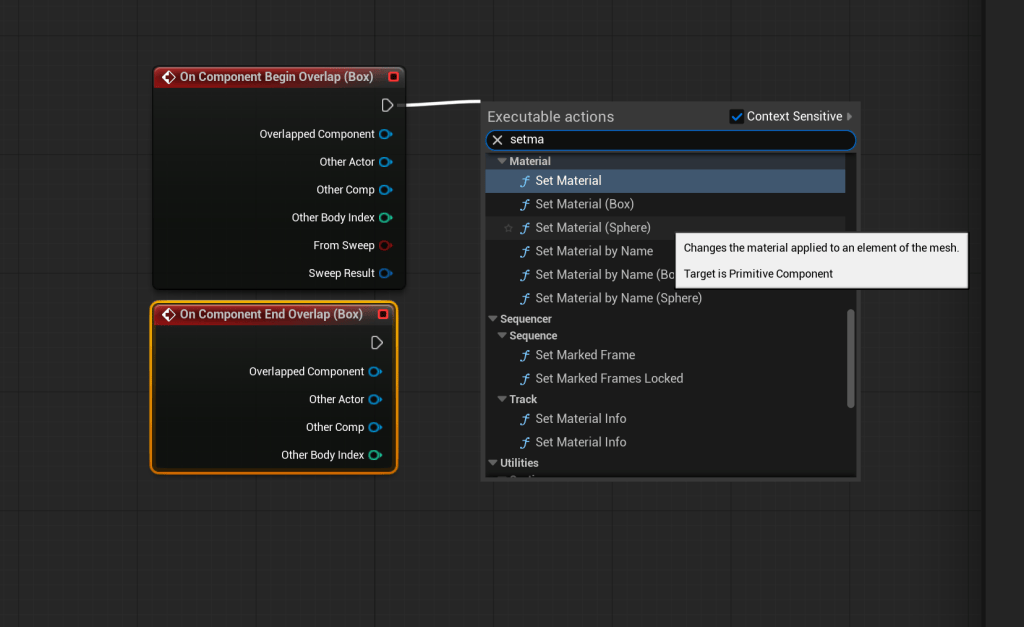
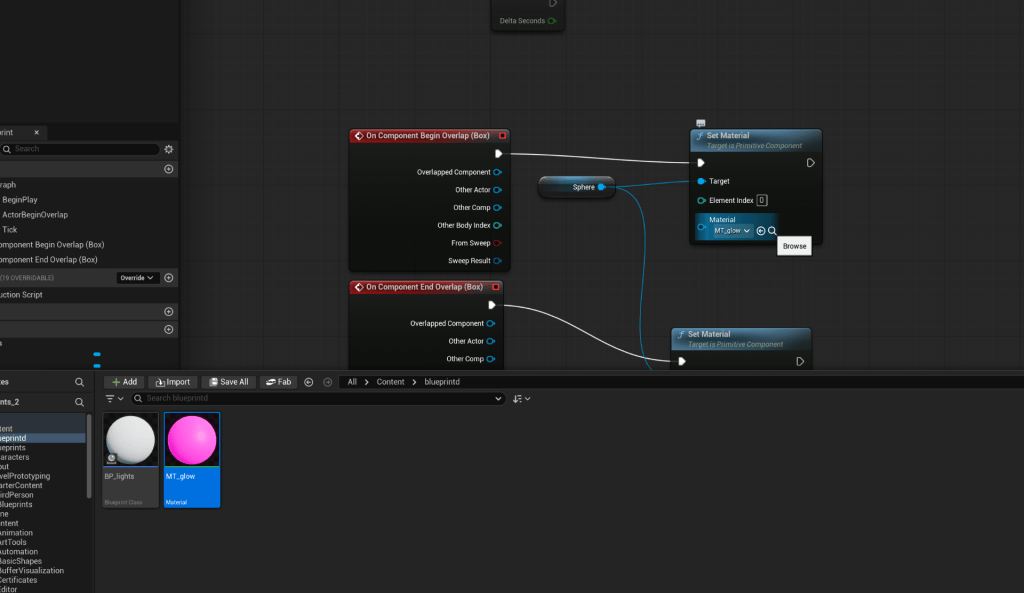
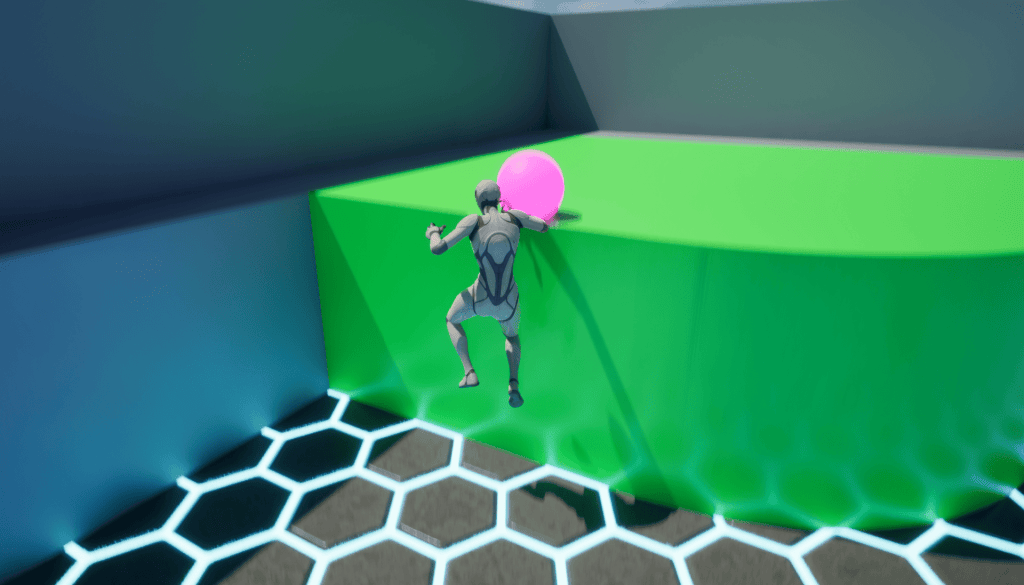
- Open Unreal Engine 5.
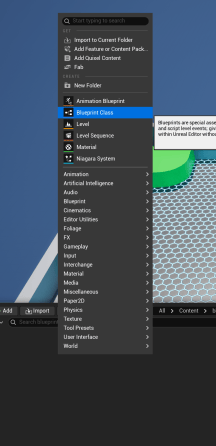
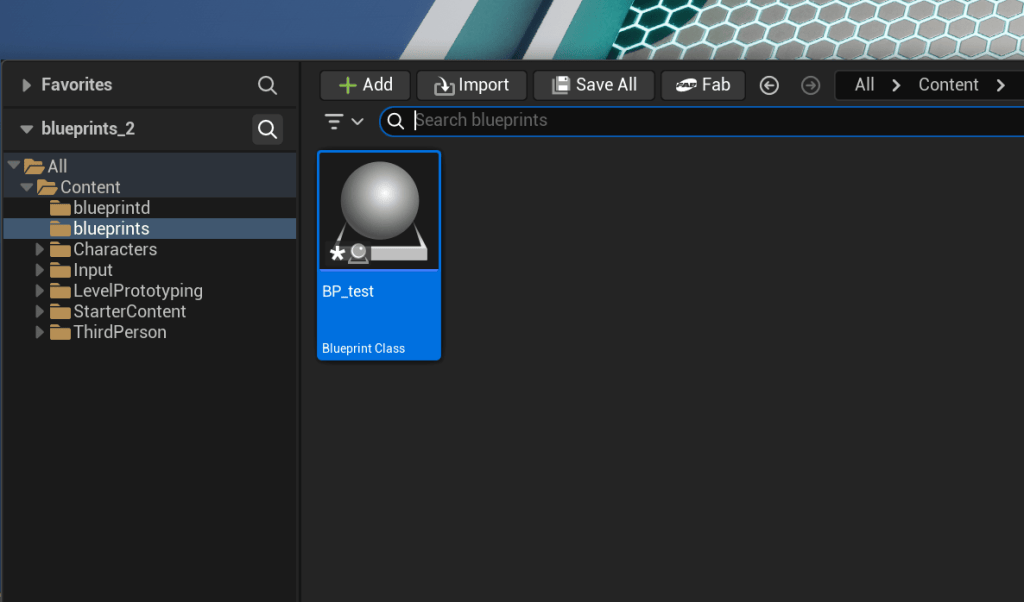
- Click on content drawer, Right click, add new folder, Rename it blueprints. For blueprints always start from BP_.
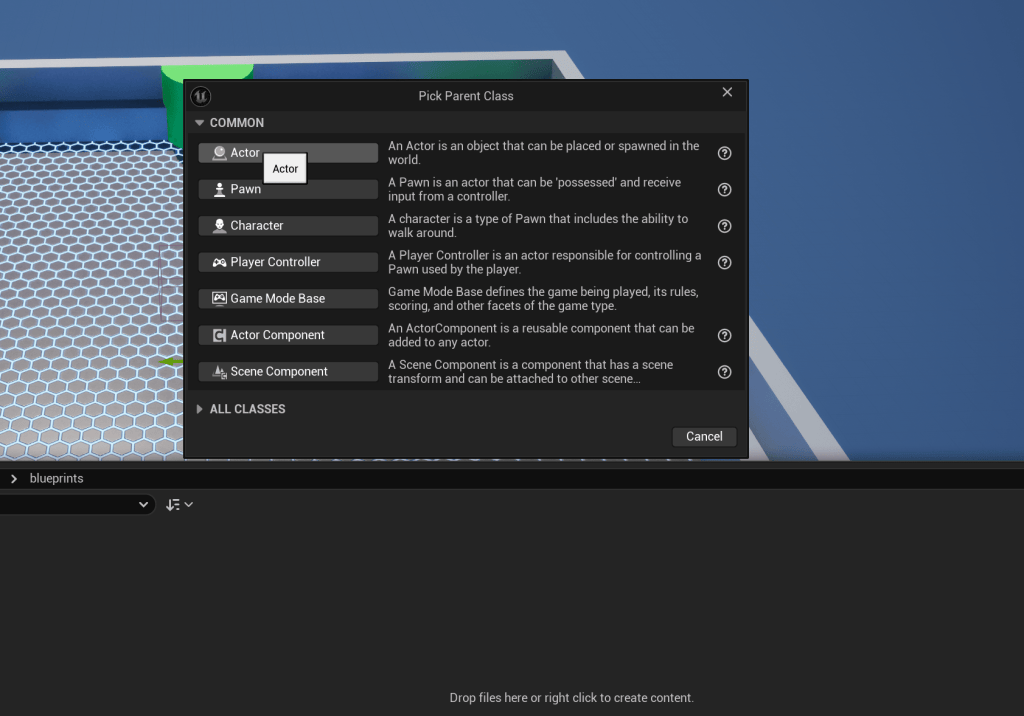
- Right click again, click on Blueprint Class, Select actor. Then double click.
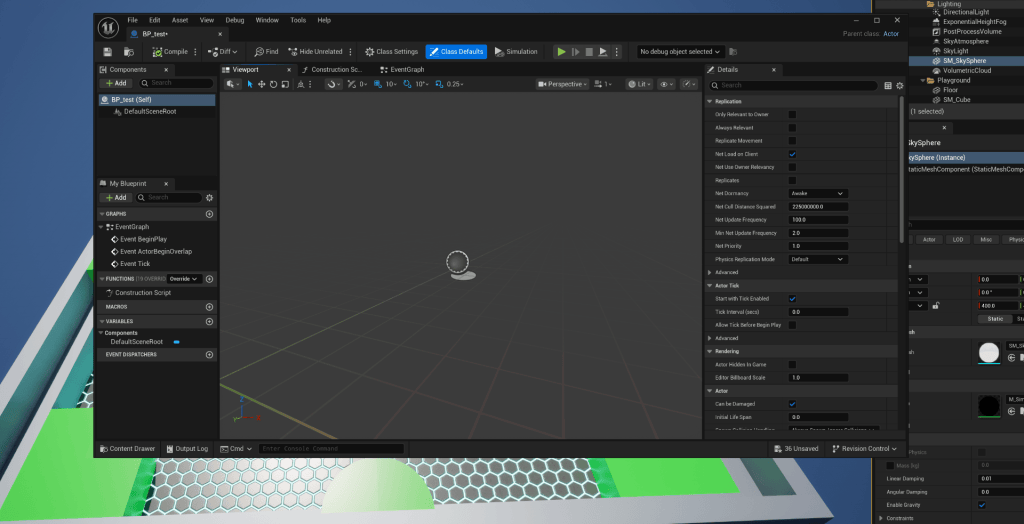
- Go in Event Graph view.
- To work on default value of float, integers, compile the file first.
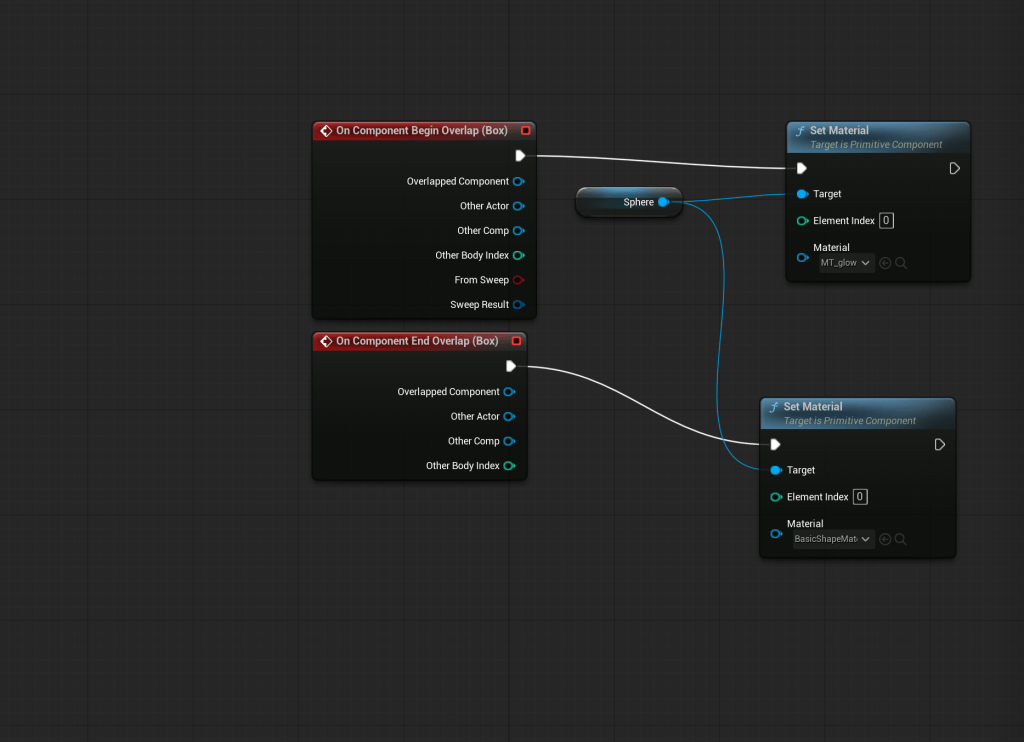
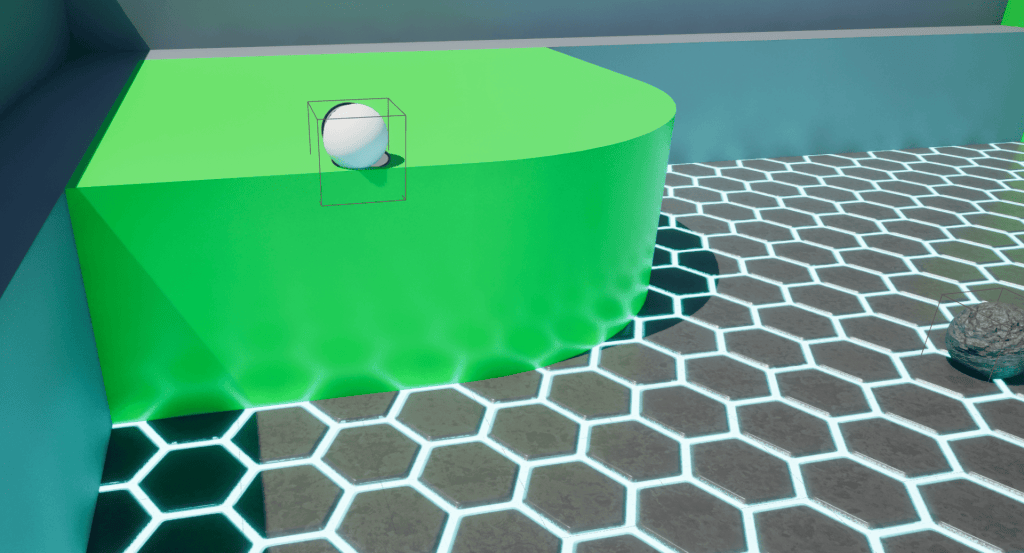
- Click on Add, search Box collision. slide down details of box collision, got to end in events, select on component Begin Overlap.
- Right click, search for set material (sphere).
- Add material in set material.
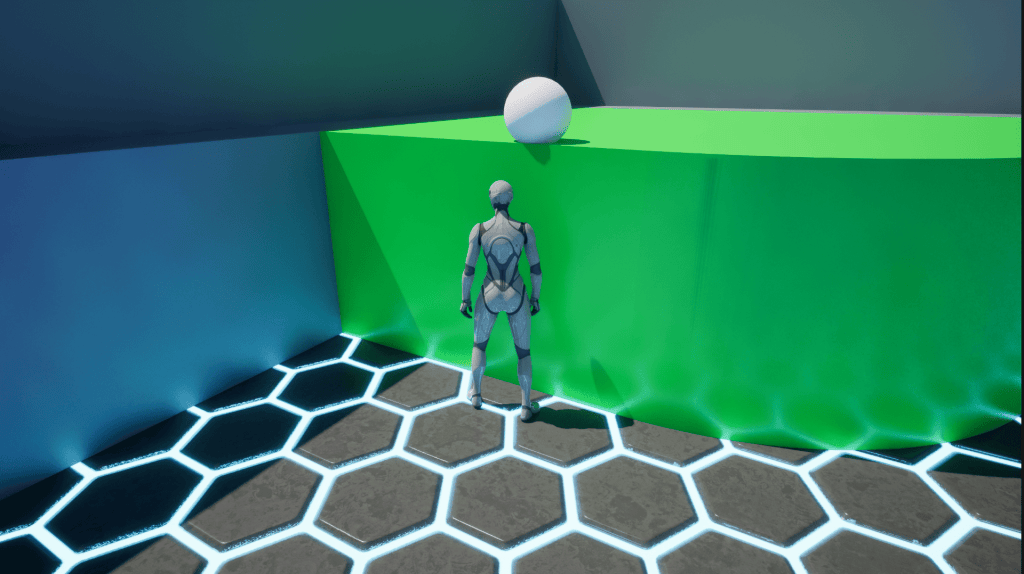
Use on component end overlap to reverse the colour when robot is not touching the collision box.
Week 5
Materials
- Scalar Parameter Node – hold s & left click
- Multiply Node – hold m & left click
- Power node – hold e & left click
- vector 4 for colour
- texture Sample
- Append
- Constant
- Normalize
- text coordinate
- landscape layer blend
Creating Materials
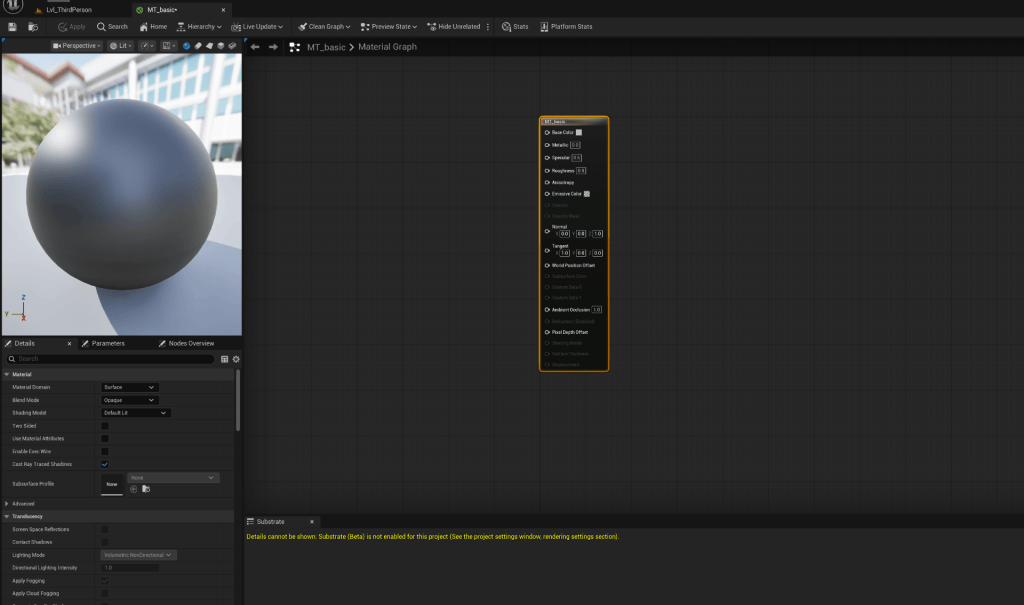
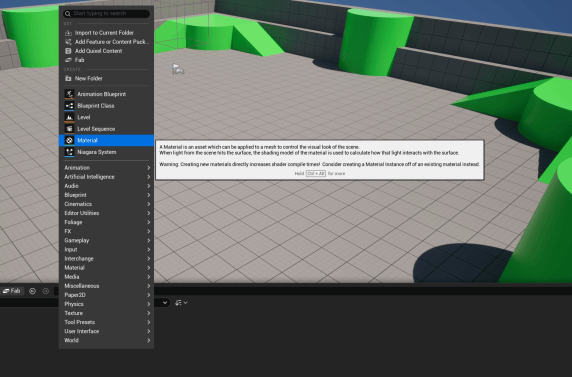
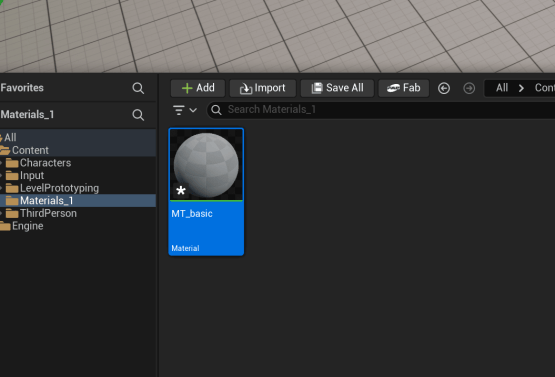
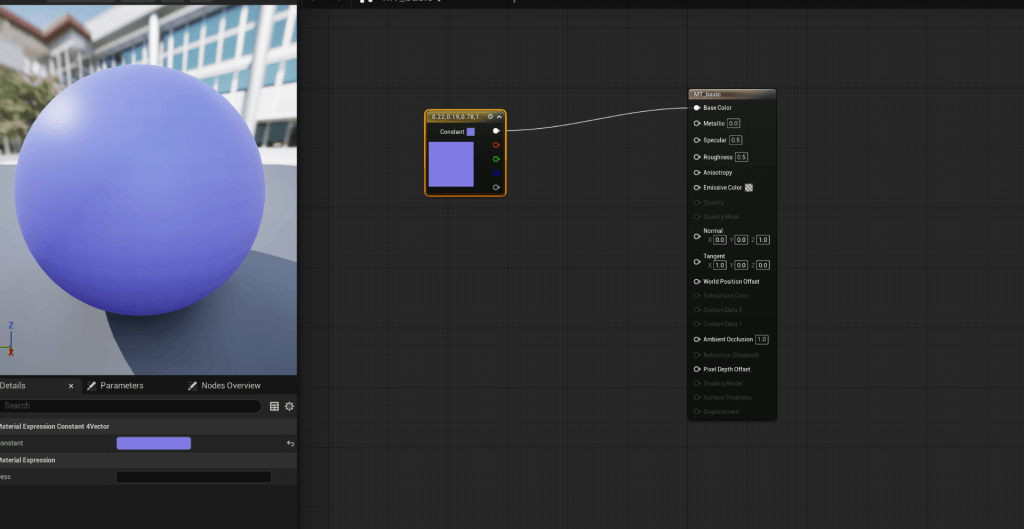
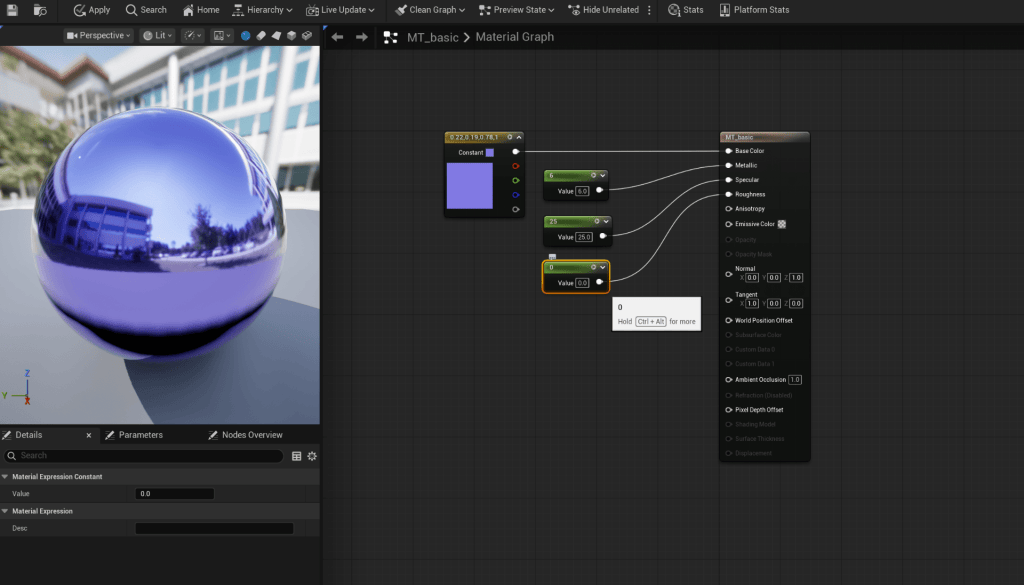
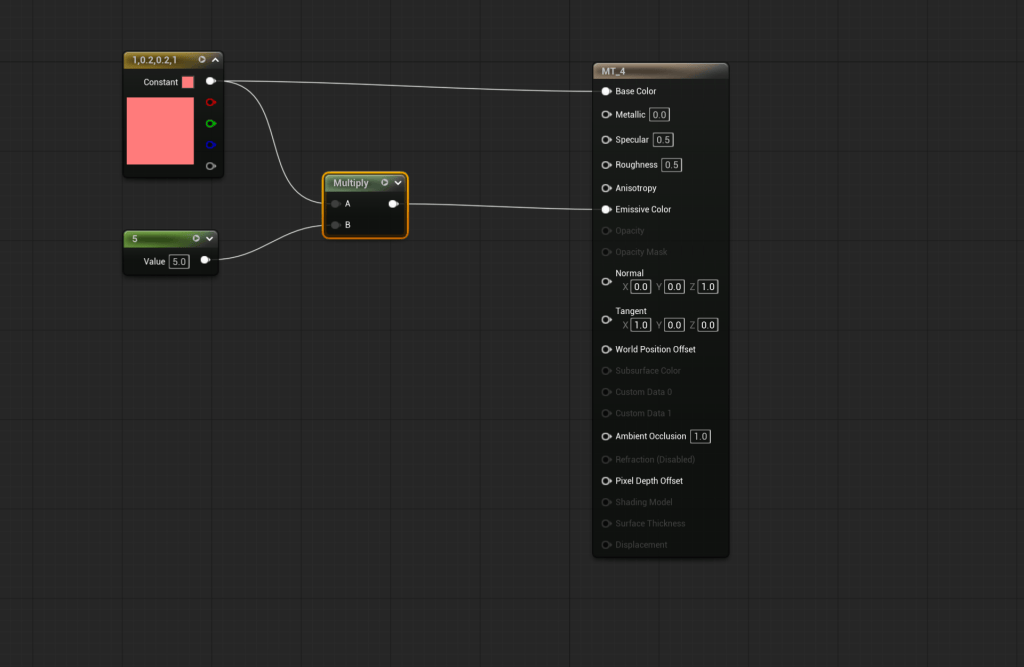
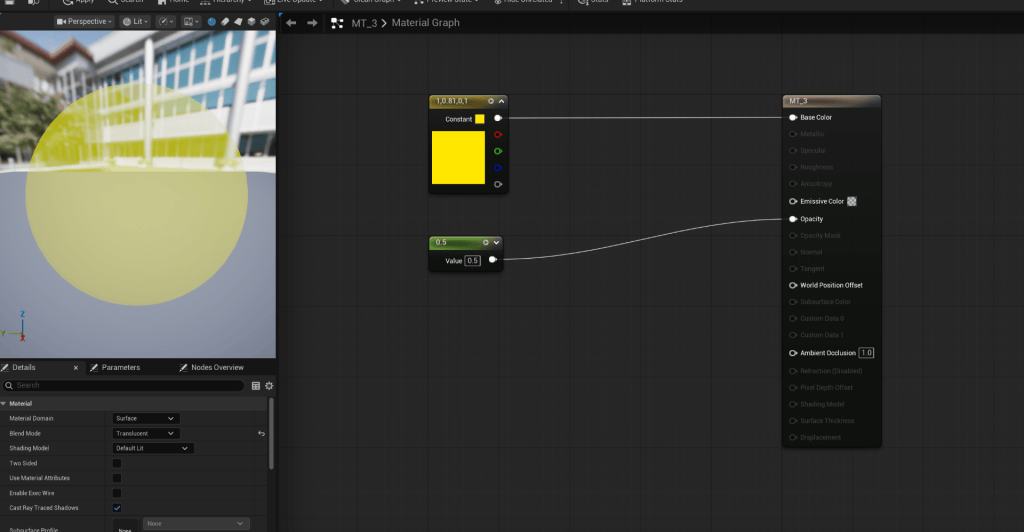
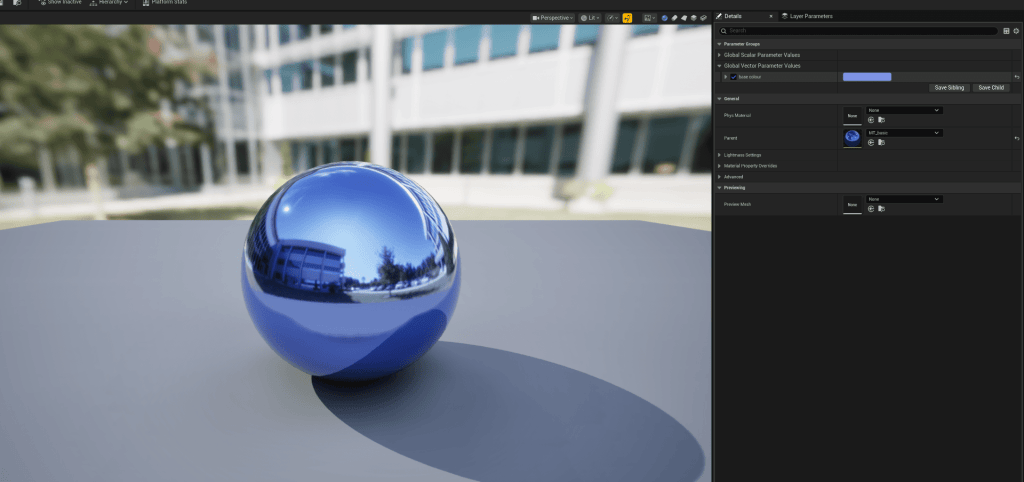
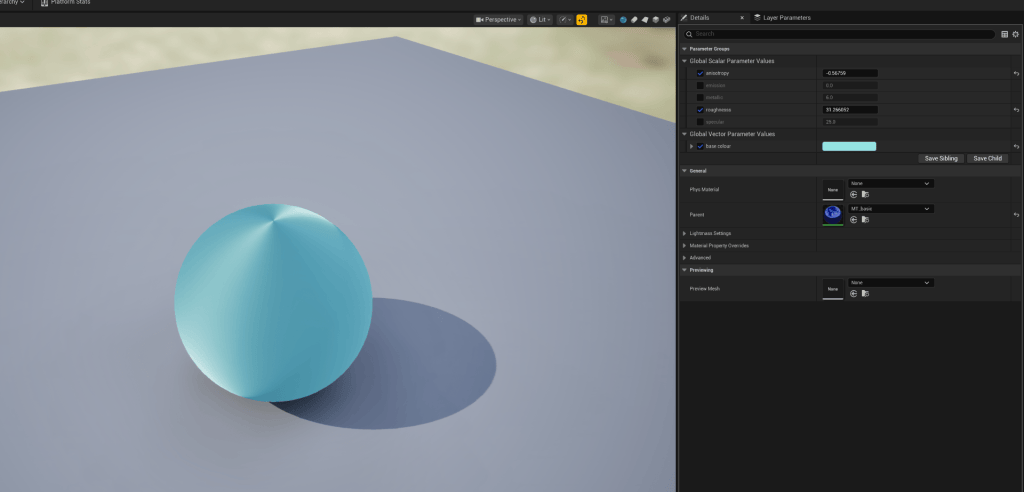
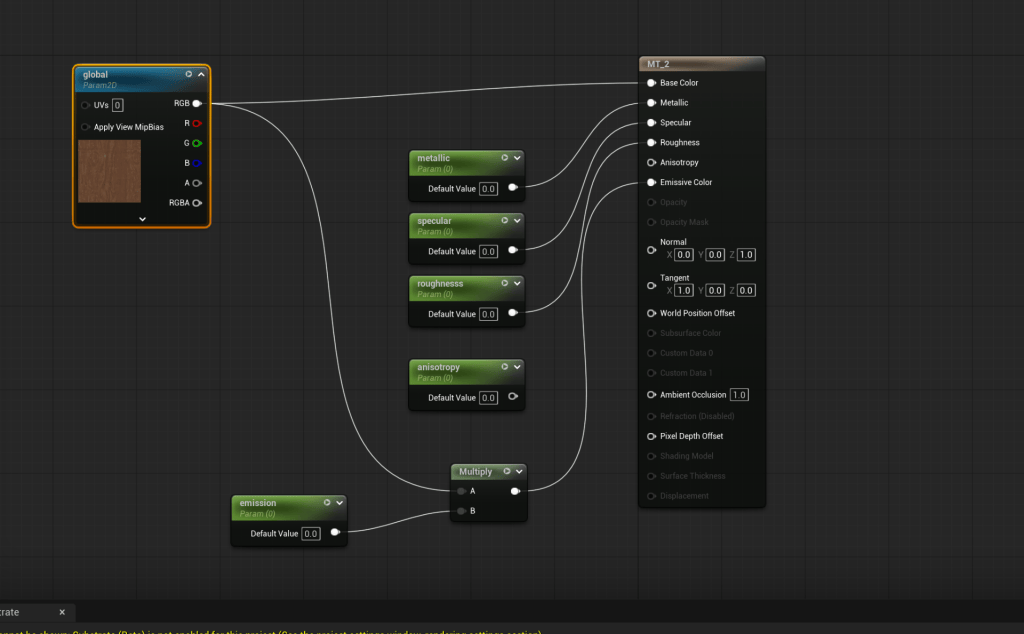
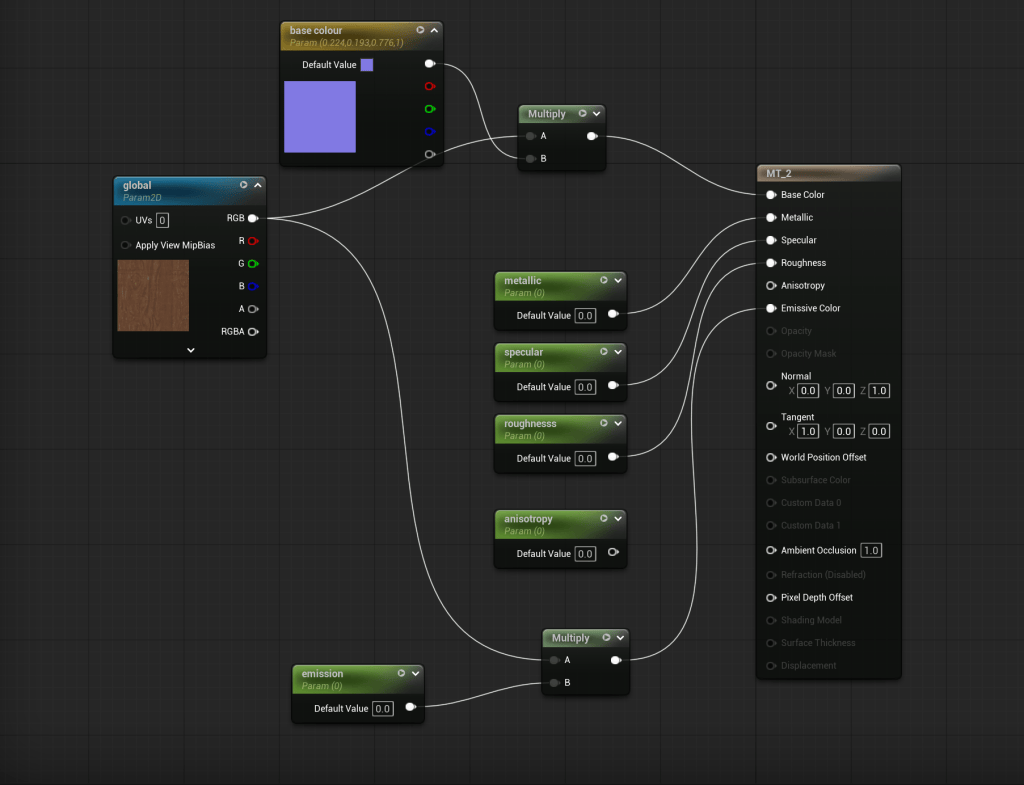
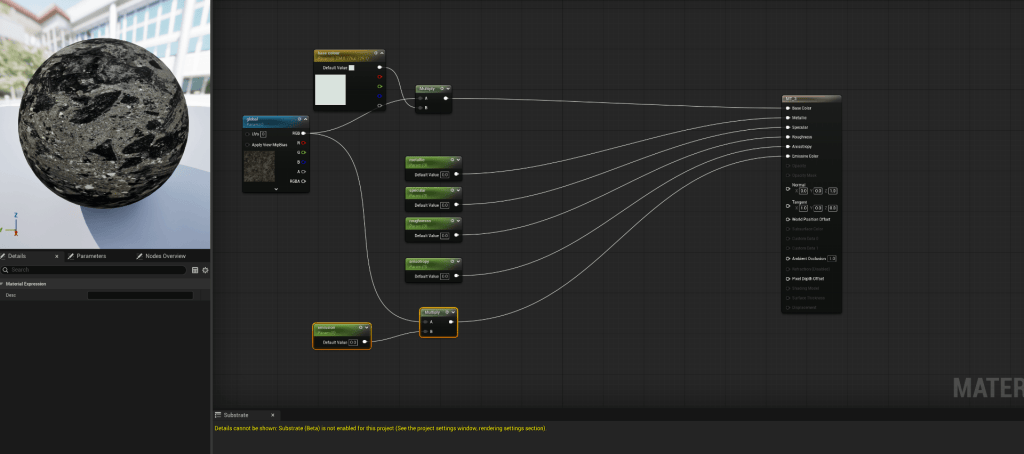
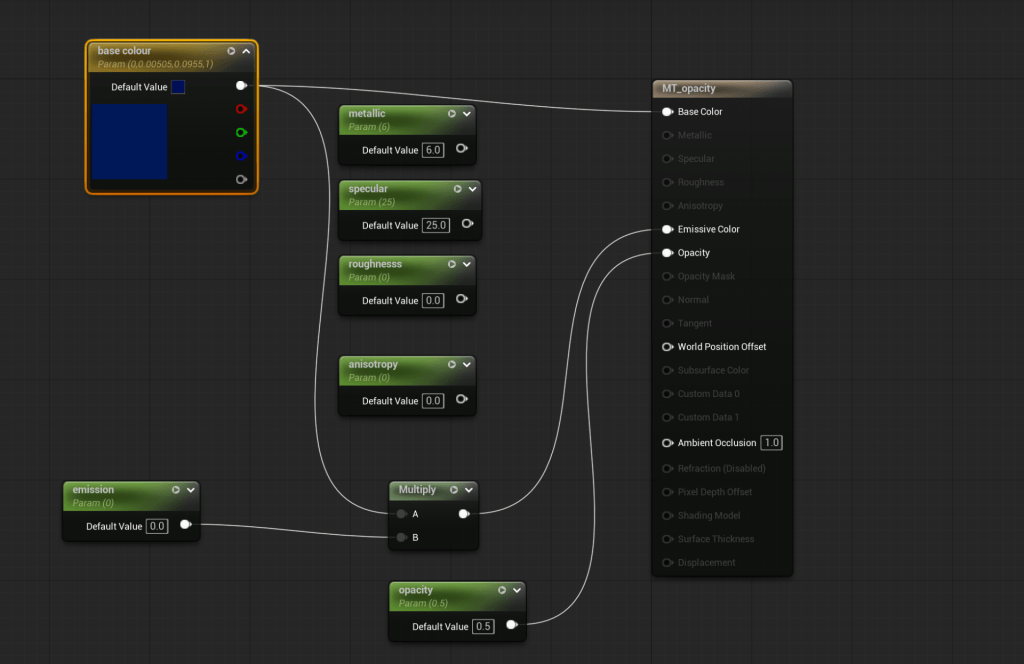
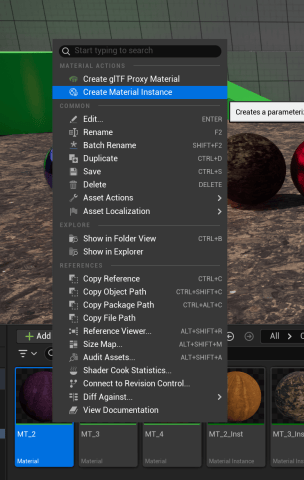
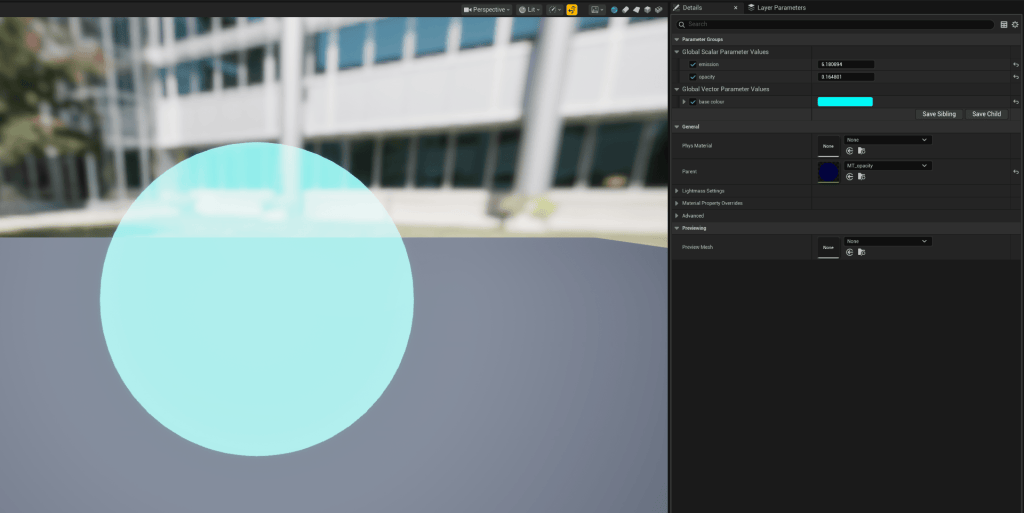
- Open Unreal Engine 5.
- Click on content drawer, Right click, add new folder, Rename it Materials.
- Right click again, click on materials. name it, then double click on it.
- Right click and search for vector constant to add colour and search for constant to change values/strength.
- use multiply to connect two things.
- Convert everything to parameter, so we can change there colour and strength in material instance.
- Right click on material, select material instance.
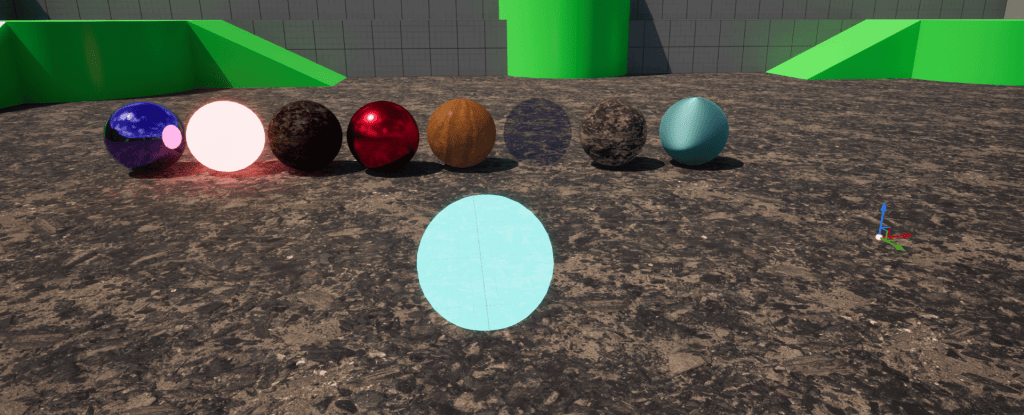
Week 6
Landscape & Foilage
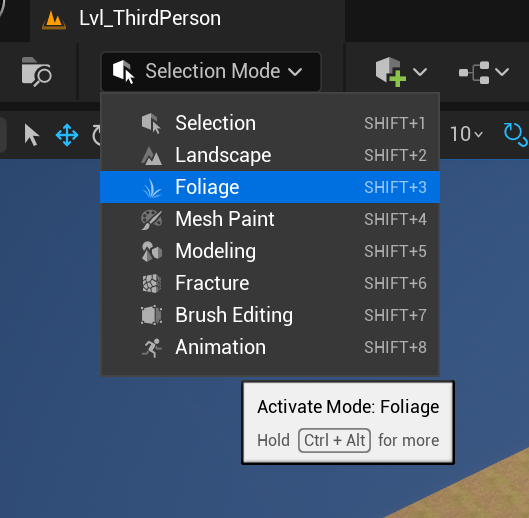
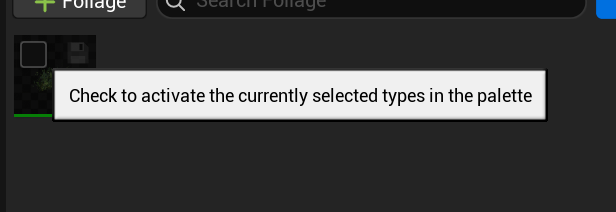
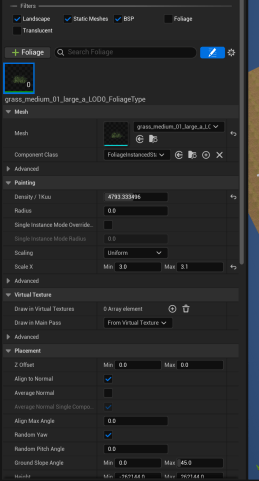
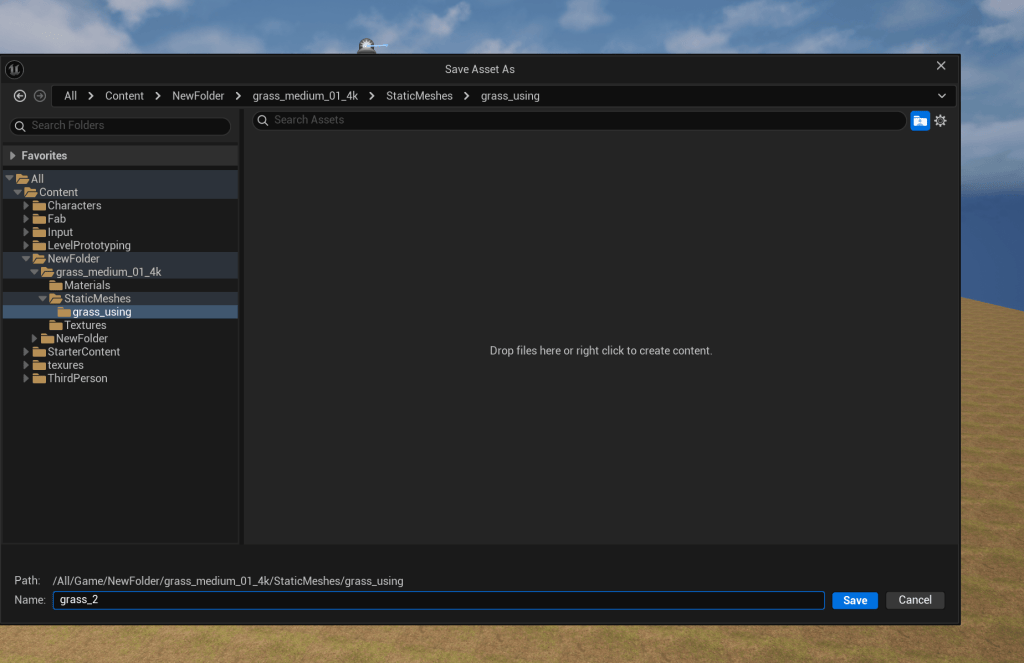
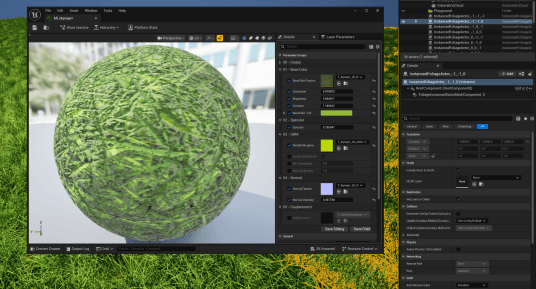
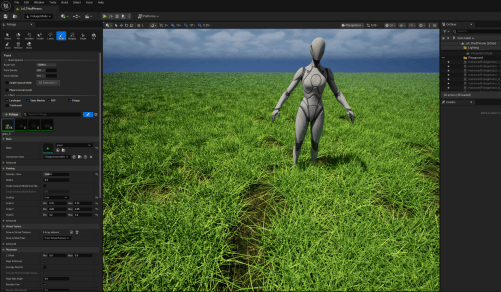
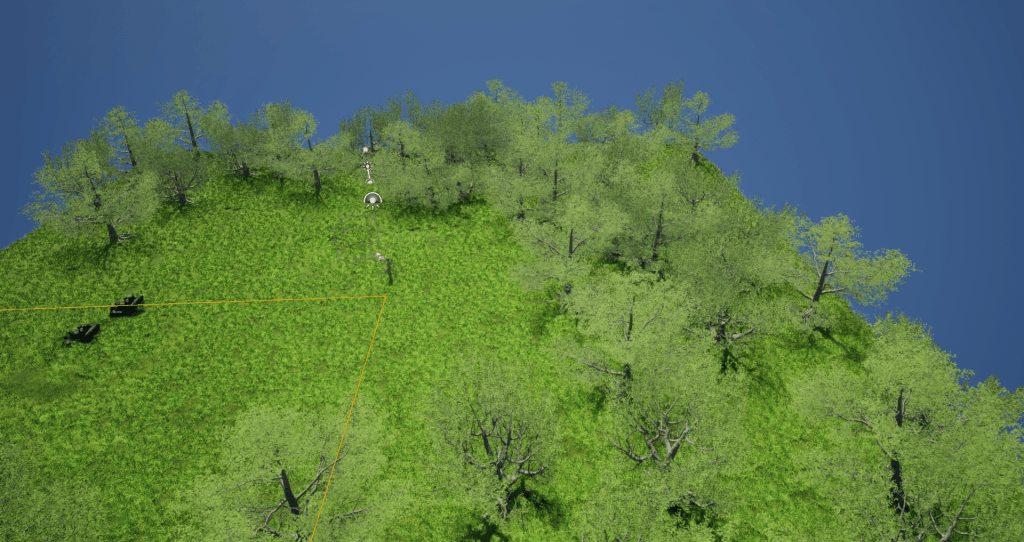
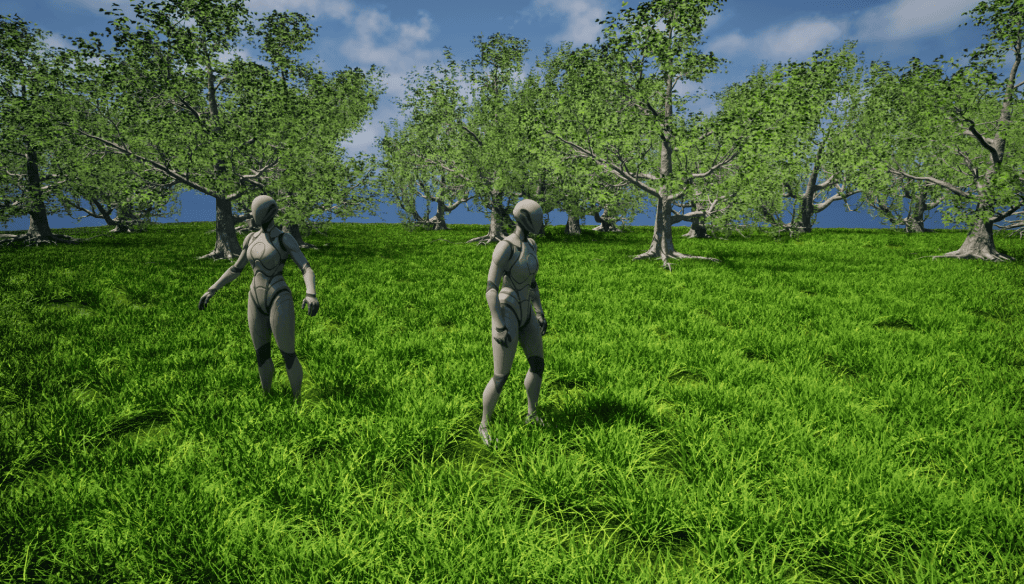
- Open unreal, save project.
- Go in fab, import grass and trees.
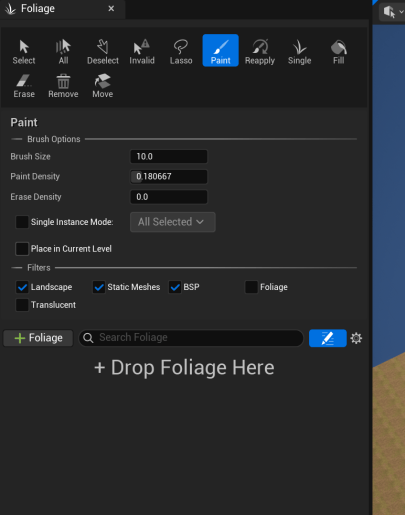
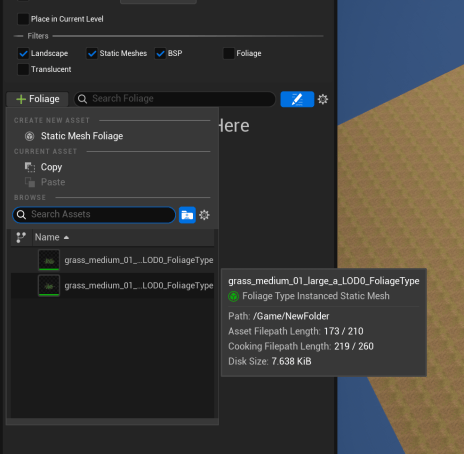
- Go in Foliage mode, click on +Foliage to add model.
- Select models u want add, click on the small box.
- Adjust size of paint brush, density, radius and more.
- Click on land to add models.
Week 7
Lighting Reflections and Audio
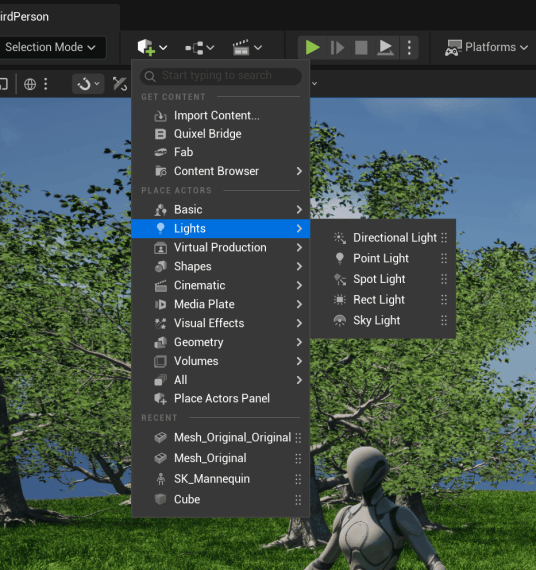
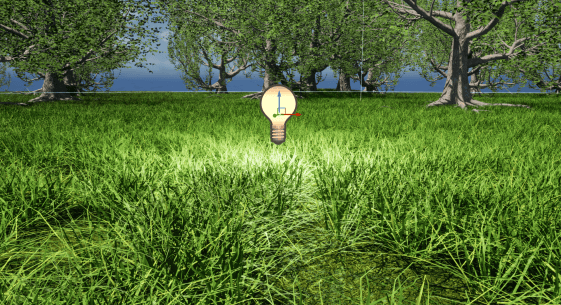
- Open unreal, save project.
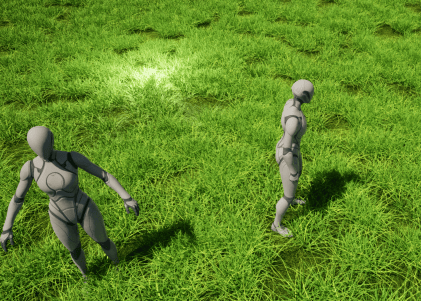
- Click on lights, select point light and different types of light.
Week 8
Sequencer, Cameras & Post Processing
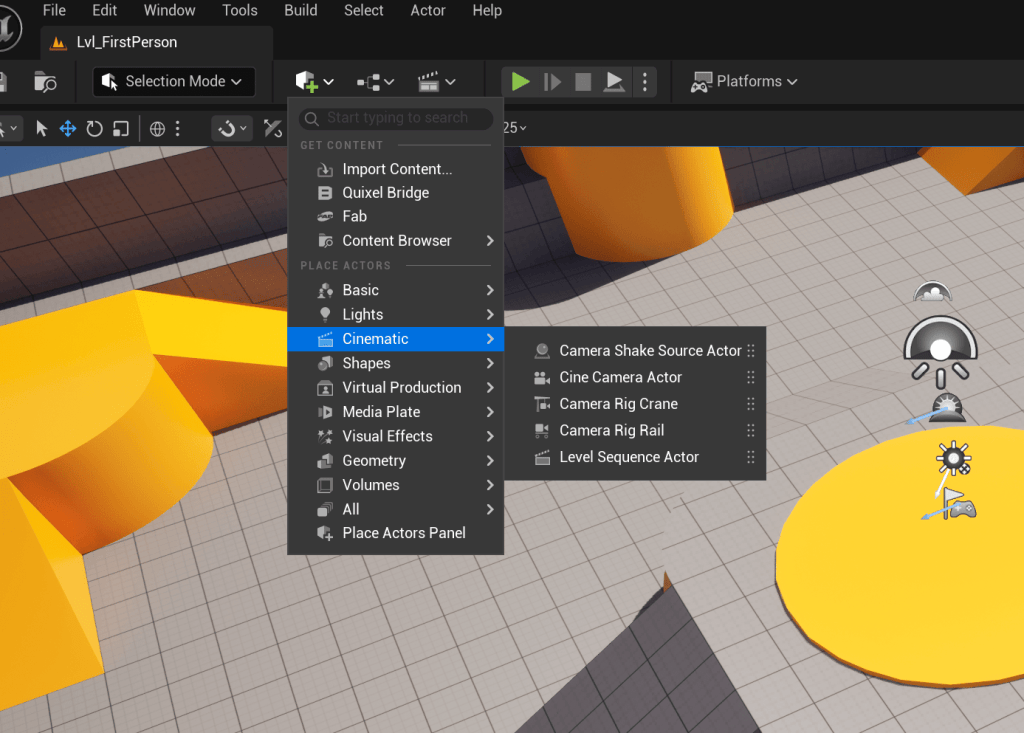
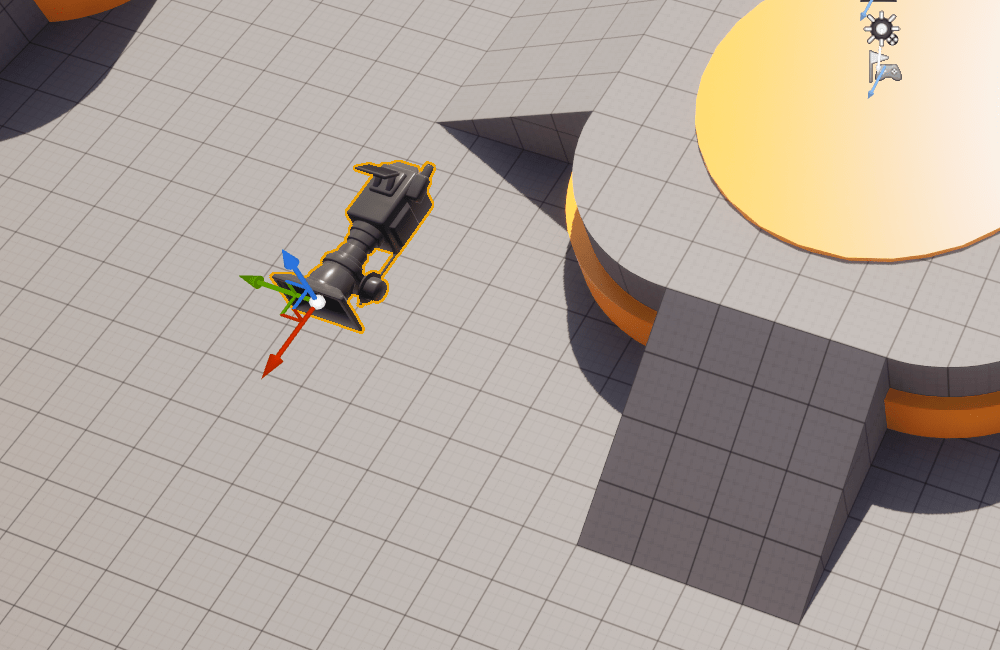
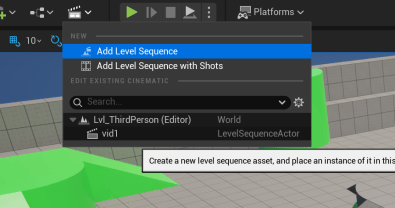
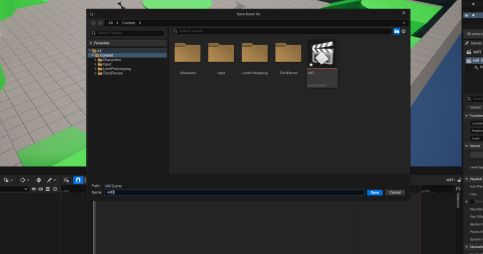

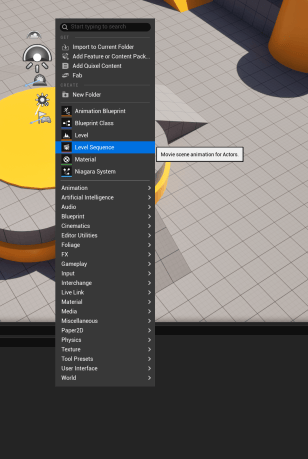
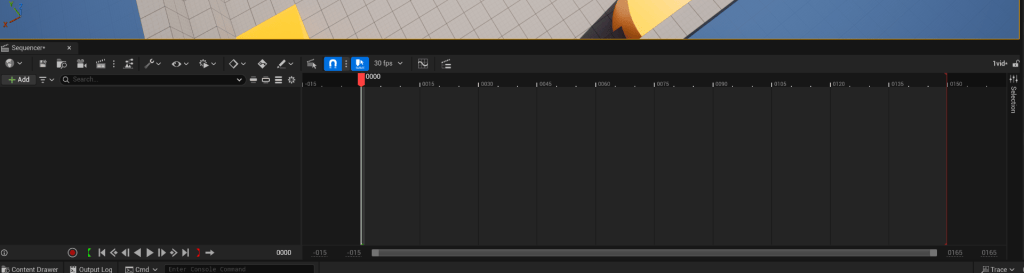
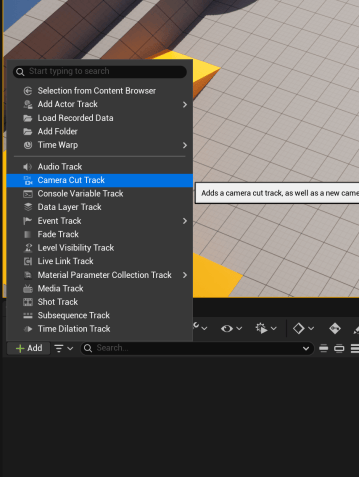
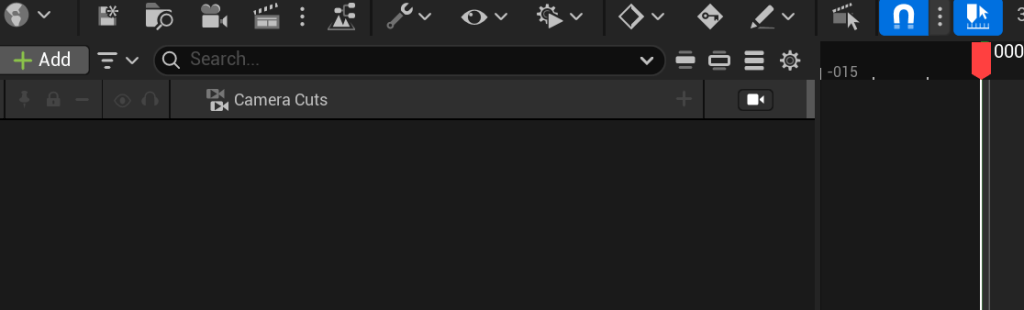
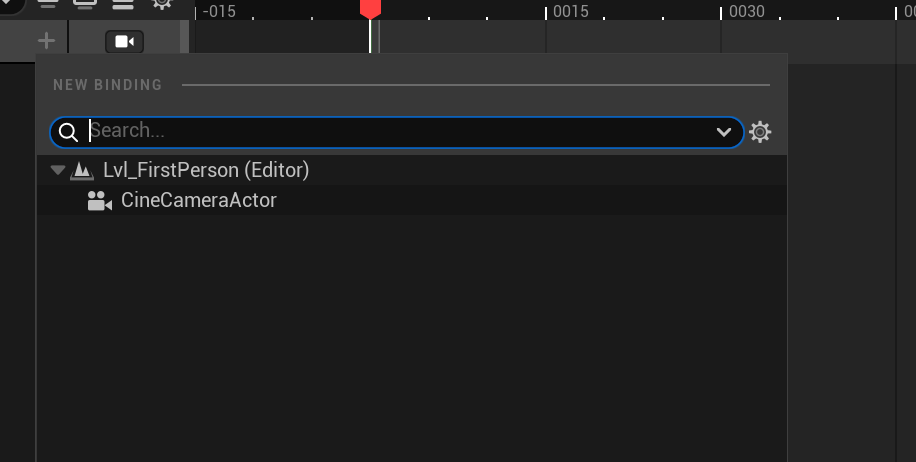
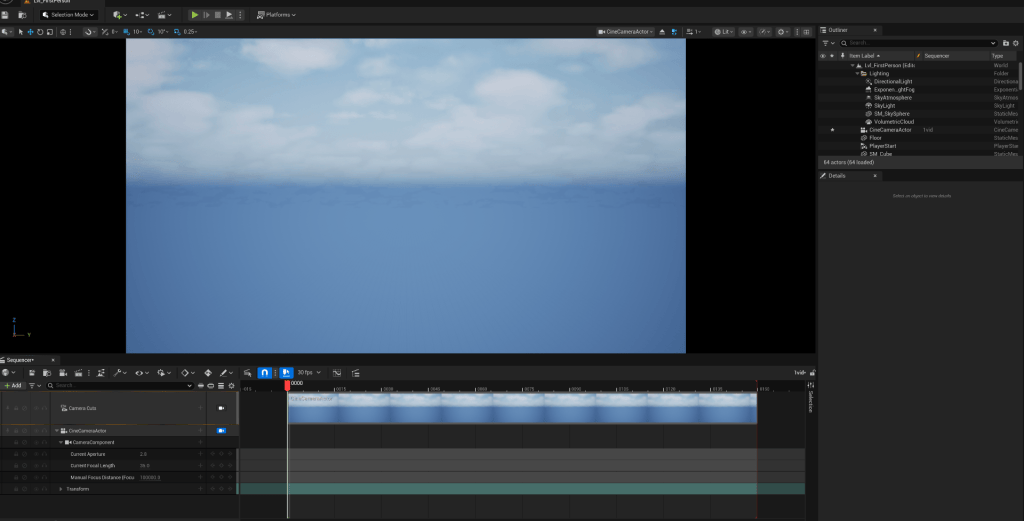

- Open the project, add Cine Camera Actor.
- click on Add level sequence.
- Go to content drawer, right click, select level sequence.
- Click on Camera cut track, Click on + sign, select CinecameraActor.
- click on transform, press enter to add keyframes in scenes.
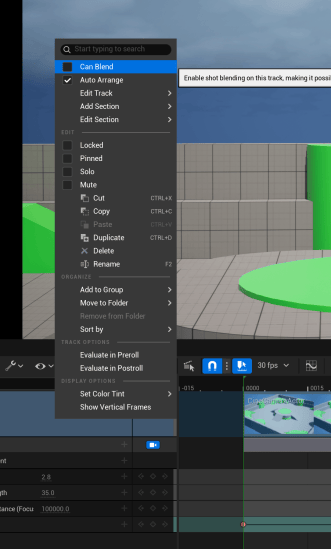
- After adding keyframes, right click on camera cuts, click on Can Blend.
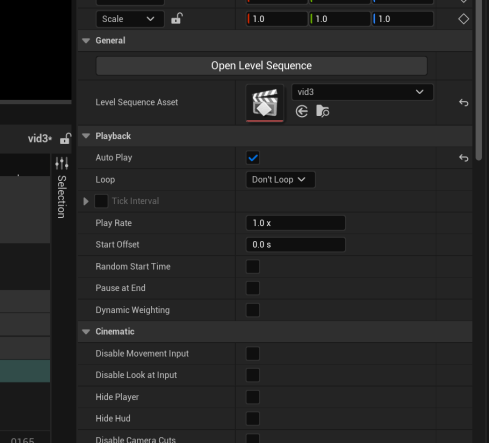
- click on auto play.
- play the game, it will work.
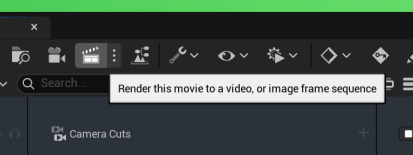
- Render the movie.
Result
Weekly work
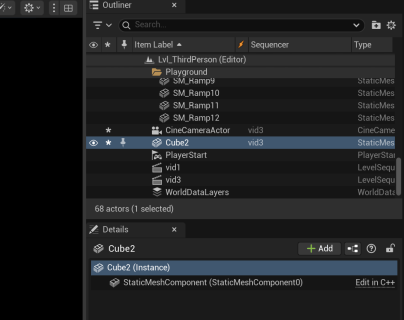
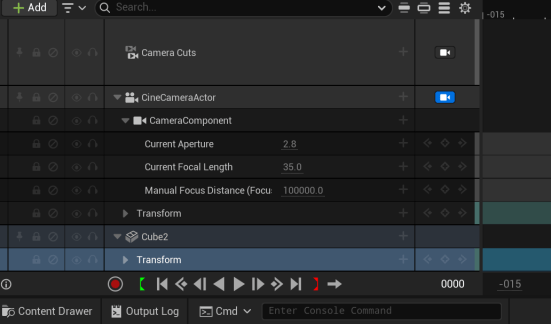
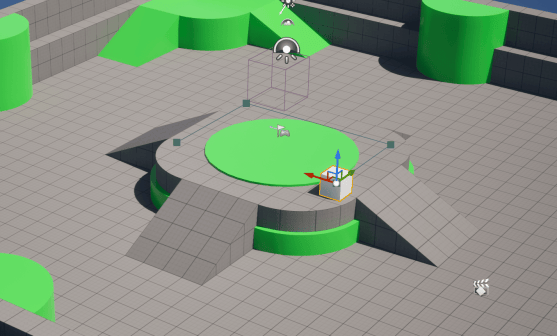
- Import the mesh in sequence.
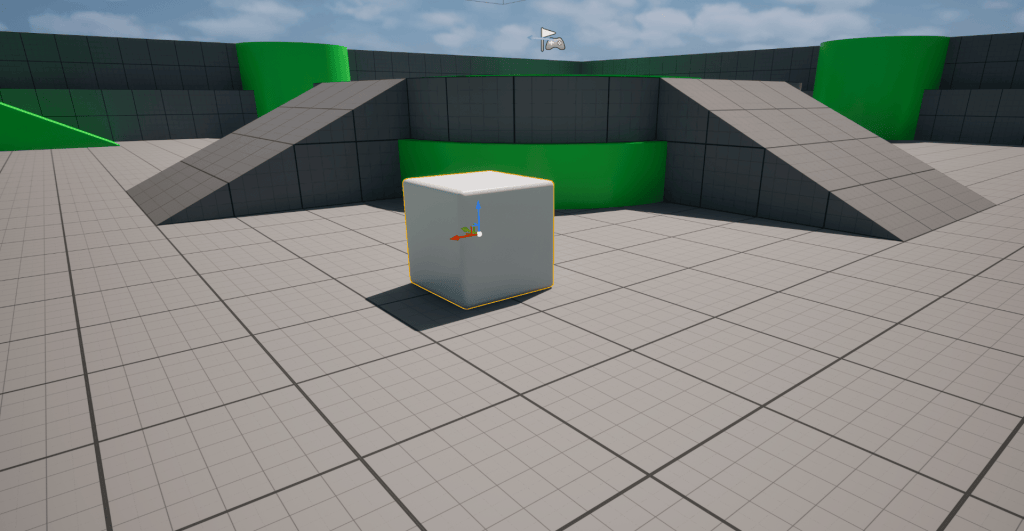
- Move the cube and add keyframes.
- Render the video.
Week 9
Advanced Blueprints & Widgets
- Begin play
- Print String – to write text
- Add custom event
In this lesson we looked at more applications of blueprints and widgets, we looked at examples such as making a vehicle start a select amount of times and having it fail until a event tied to a reset input is activated. we also looked a creating a health bar that is reduced as a player comes into contact with something.
I get know blueprints save time by making systems reusable and easy to edit instead of recreating the same effects repeatedly. For example, collision boxes use to trigger particle systems through blueprint events, allowing the same setup to be reused across multiple instances while still letting developers change parameters when needed. This also applies to systems like character aura colour changes based on health or weather systems that adjust density automatically. Overall, blueprints improve workflow by turning assets into reusable, customizable tools that make projects more organised and easier to manage. They are especially useful for VFX because issues can be traced back to a single blueprint rather than searching through scattered project files.
One example is a fire effect that only becomes visible when a player interacts with a specific object. This saves processing power because the effect is not constantly rendered. By creating this as a blueprint, it can easily be reused in future projects and used by others without needing them to build the system themselves.
week 10: Creating a Niagara system
we created a niagara particle system, It was too easy and cool, I am thinking to add this in my final project.
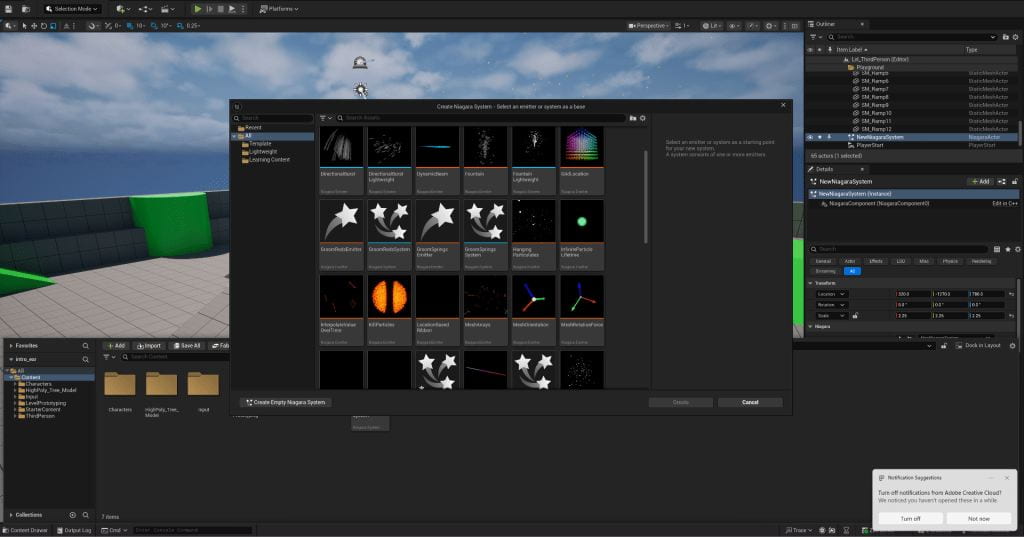
Assignment
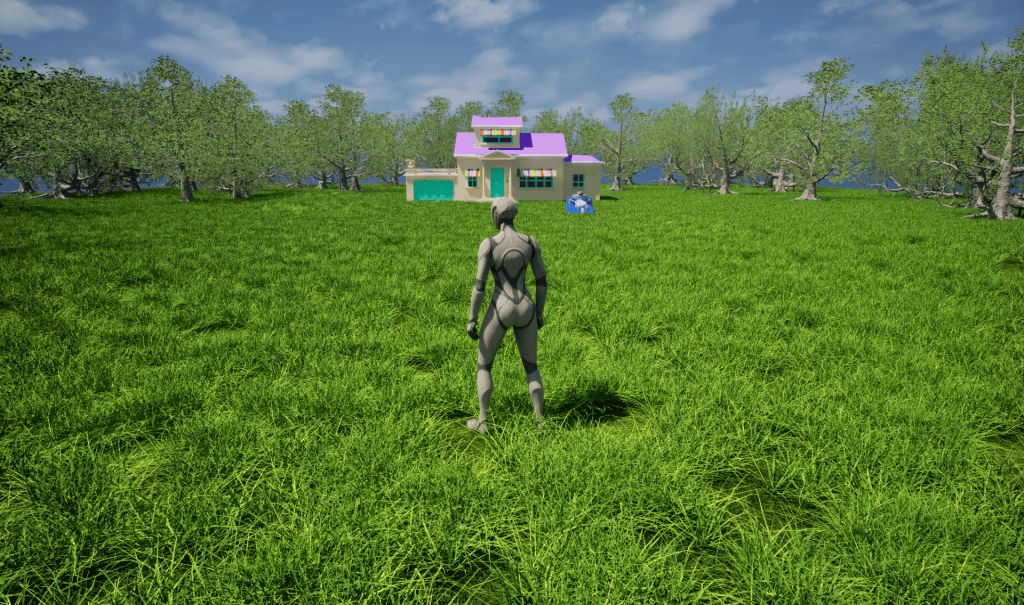
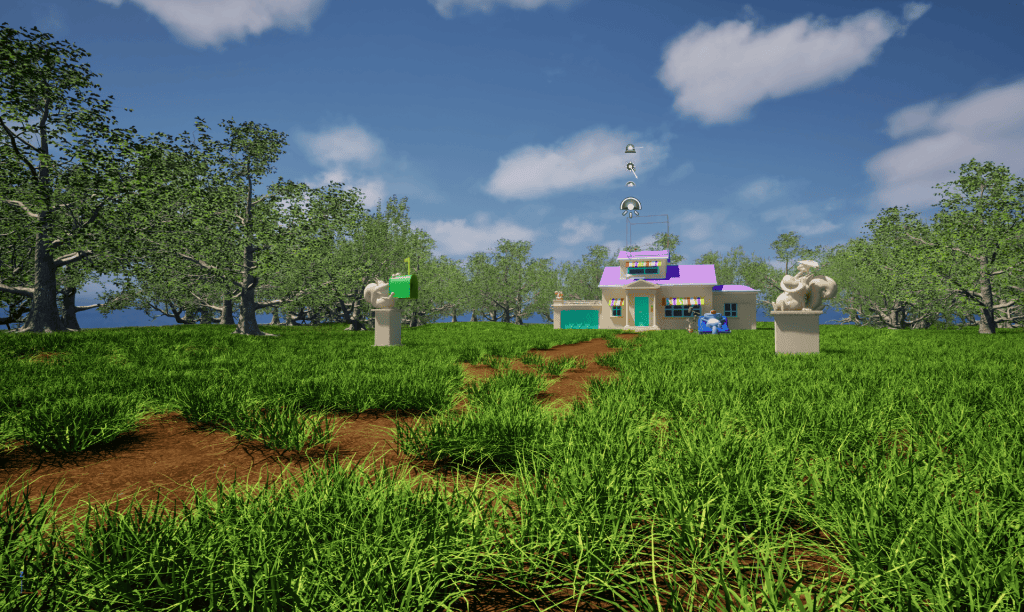
final video for submission
Second video
I have added song in he first one, added effects, change lightings.

